> ## Documentation Index
> Fetch the complete documentation index at: https://botpress-ak-docs-20-document-updating-variables-from-outsid.mintlify.site/llms.txt
> Use this file to discover all available pages before exploring further.
# Workflows
export const GoodToKnow = ({children}) => {
return
{children}
;
};
So far, we've only had our bot generate responses using AI. In practice, though, you might run into situations where you want your bot to perform some hard-coded logic.
In Studio, you can do this using *Workflows*. A Workflow is a drag-and-drop canvas that represents the steps your bot follows during a conversation with a user.
## Nodes
Each step in a Workflow is represented by a *Node*. Let's open the Main Workflow and take a look at its Nodes:
1. Go to the ** Workflows** section in the left sidebar.
2. Select your **Main** Workflow. It should look something like this:
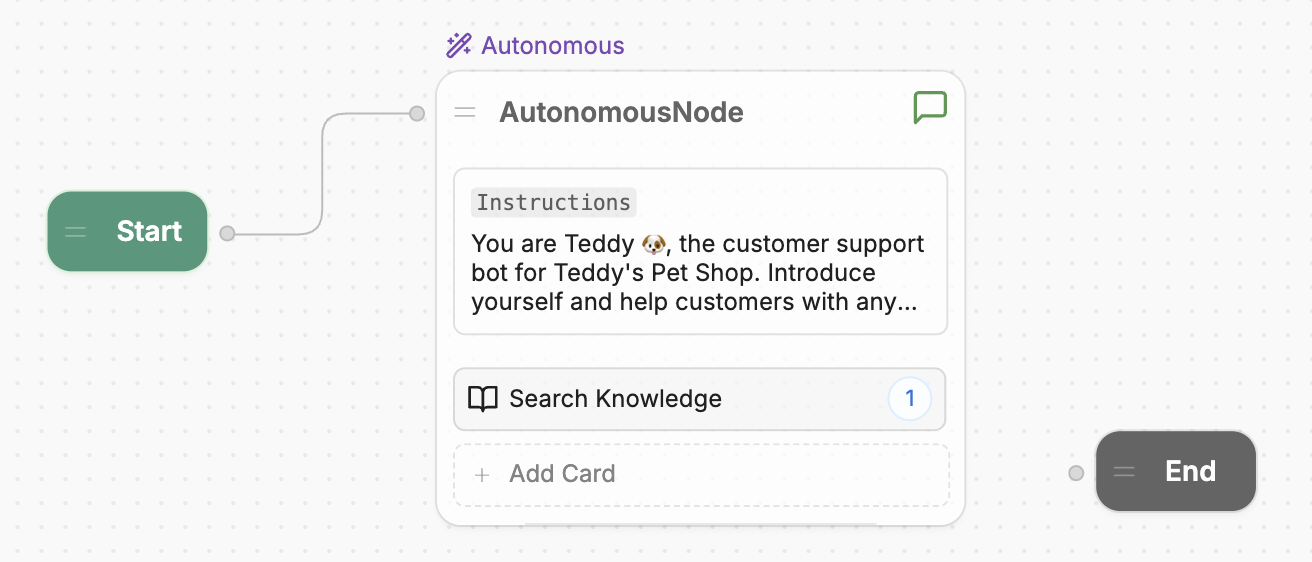
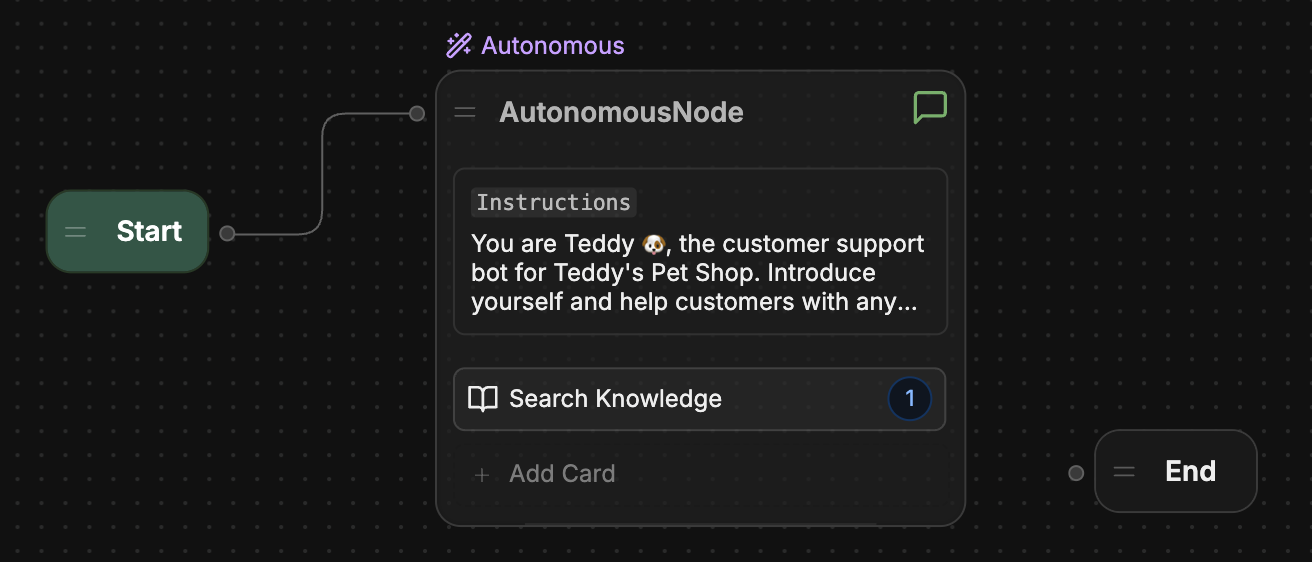 The Main Workflow contains the main logic for your bot—it executes as soon as a user starts a new conversation. By default, it contains:
* A *Start Node*, which starts the conversation
* An *Autonomous Node*, which generates AI responses
* An *End Node*, which ends the conversation
You may have noticed the Autonomous Node has an **Instructions** field with the same instructions we provided earlier. This is no coincidence! The settings on Studio's home screen are shortcuts to configure the Autonomous Node.
## Transitions
Notice the path connecting the Start Node and the Autonomous Node:
The Main Workflow contains the main logic for your bot—it executes as soon as a user starts a new conversation. By default, it contains:
* A *Start Node*, which starts the conversation
* An *Autonomous Node*, which generates AI responses
* An *End Node*, which ends the conversation
You may have noticed the Autonomous Node has an **Instructions** field with the same instructions we provided earlier. This is no coincidence! The settings on Studio's home screen are shortcuts to configure the Autonomous Node.
## Transitions
Notice the path connecting the Start Node and the Autonomous Node:
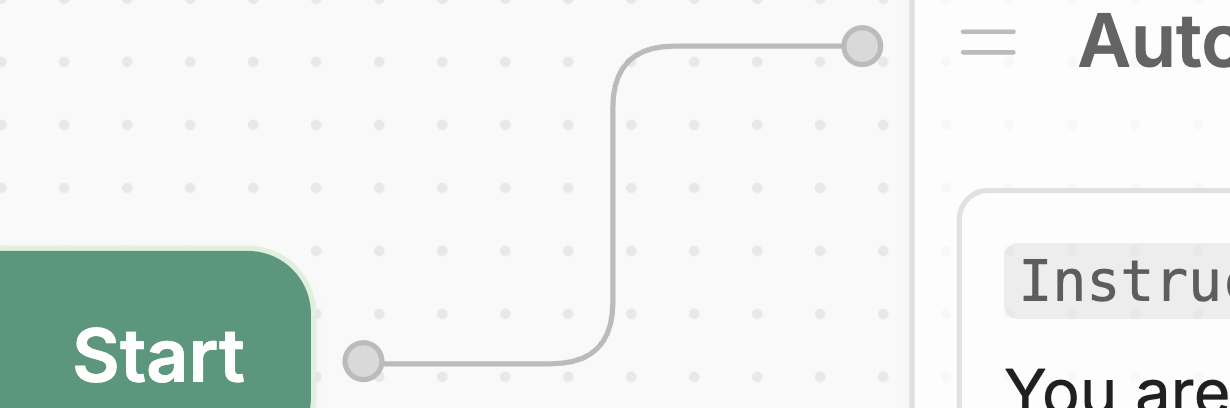
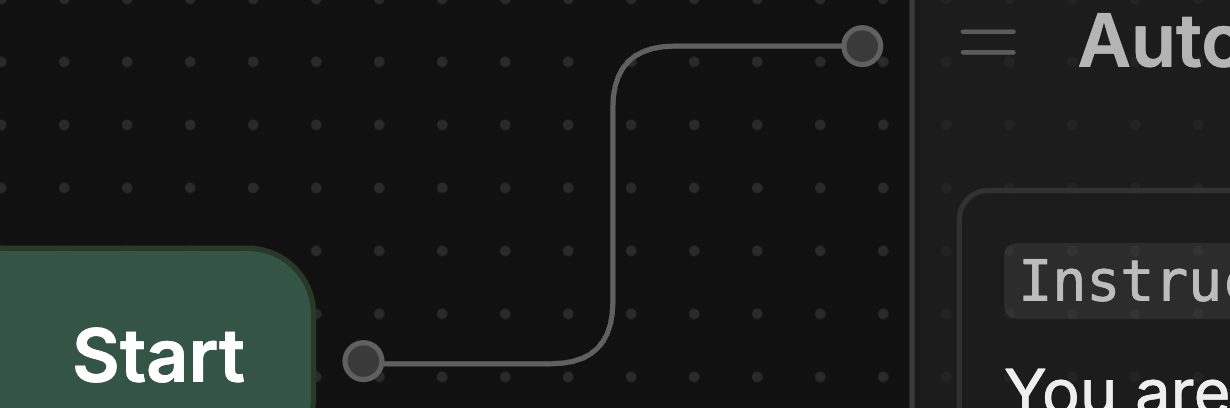 This is a *transition*. It tells your bot:
> "When the conversation starts, go directly to the Autonomous Node."
This is a *transition*. It tells your bot:
> "When the conversation starts, go directly to the Autonomous Node."